9 December 2016

One Ball Waterfall Scarf

A few weeks ago, I picked up some lovely 'fancy yarn' from the middle aisles in Aldi, without really having a plan for it. I eventually decided it would make a cute scarf so had a quick browse on Pinterest (as you do...). I found a few I quite liked, although none of them were exactly what I was looking for, so I amalgamated a couple of the patterns to come up with my own.

These are really easy to make and only use most of one 50g (130m) ball of wool/yarn. The large crochet hook means they look lovely and lacy, but come together really quickly - easily doable in an afternoon, and ideal Christmas presents!

Pattern (I have used US crochet terms - UK crochet terms are in square brackets)

50g yarn (I used a cotton/acrylic mix)
10mm (P-size) crochet hook

Ch 100
Row 1: sc [dc] in the second ch from the hook (1 sc [dc] in each ch) to the end. ch 2 and turn
Row 2 - 5: (1 sc [dc] in each sc [dc]) to the end. ch 2 and turn
Row 6: (2 dc [tr] in each sc [dc]) to the end. ch 2 and turn
Row 7: (2 dc [tr] in each dc [tr]) to the end. Fasten off and weave in all yarn ends

3 December 2016

We Wish You a Merry Christmas

Having started crafting as a cardmaker, I now rarely make cards - if you receive one from me, you're privileged! However, I do try to find the time to make Christmas cards. There is rather a conveyor-belt process to making them - they're all the same but, after a bit of effort this week, they're made, ready to be written and posted.

The stamps are all from the Mistletoe collection acrylic stamps by Kaisercraft and, although it's not clear from the photo, I've used clear Wink of Stella on the trees to give them a lovely shimmer.

Happy Christmas!

27 November 2016

Twelve Photos

In direct contrast to last week, this week I was scrapbooking with lots of photos!. I recently had printed around 250 photos from our holiday - essentially I picked all the photos I really liked, without any scrapbooking plans in mind. Having sorted out the photos, I found that I had nearly 30 photos for this particular excursion! Obviously they're not all going to fit on one scrapbook page, so they then needed to be split up further. Some of those photos havent' made the final cut, but this page has ended up as a double layout, plus two half pages - effectively a 3 page layout!

This has enabled me to include 12 photos in this layout - the landscape photos are all 4x6 inches, but I was able to keep the portrait photos at their printed size of 4.5x6 inches. The two 12x6 inch strips will sit in between the two 12x12 inch pages and have been created to benefit from the design on the full sized pages.

I've mainly used the Good Morning paper with some accents of the reverse of the Happy paper from the O Happy Life collection from Amy Tangerine for American Crafts. The Good Morning paper is very easy to fussy cut to make further embellishments, and looks great with accents of Nuvo crystal drops. The cute camera is from the Simple Stories You Are Here collection.

I still need to add labels to the photos - I'm already pretty close to forgetting what some of these flowers are, so that's definitely an important step!

19 November 2016

Scrapbooking Without a Photo

When you think about scrapbooking, it's almost always pages with a photo - whether you're wanting to record precious memories, or you have a story to tell. Just sometimes, though, there's information you want to record which doesn't have, or need a photo. This page is one of those.

This is actually going to be the first page of an album to record a special holiday we've recently taken. There was a lot of flying involved and I wanted to record our route. The Here paper from the Go Now Go collection by Shimelle for American Crafts was ideal for this and I stitched our route with metallic thread, marking the locations with brads. The addition of enamel triangles from the #Happy collection by Alison Kreft for Webster's Pages indicate the direction we travelled. This really forms the centre of the page, in place of a photo.

The cluster in the top left-hand corner contains a little journalling, and stickers and scraps from the Shimelle collection by American Crafts, the Posh collection from Simple Stories, and the Let's Go collection from Bella Blvd.

11 November 2016

Go Big with Red

The weekly challenges are back on Shimelle's blog this week, with the latest being to go big with red on your scrapbook page. I do often scrapbook with red so, initially, this wasn't too daunting - and then I thought about the photos I currently have ready to print - lots of scope for blues, or greens, or yellows, pinks or oranges - not so much red, so I looked through them again, and discovered that these pictures from our trip to the south coast of Ireland in September had hints of red running through them - ideal!

In one of the examples on Shimelle's blog, Heather had used the 'Keller' hearts paper from the Shimelle collection by American Crafts and, knowing that I had this paper in the 12x12 paper pad, this seemed a good place to start, especially as this trip was to celebrate our 10th wedding anniversary. The red/pink/off-white diagonal stripe paper from the same collection also worked well as it gave the hearts a bit of breathing space against the blue cardstock I'd chosen for the background, and a strip of the ledger type paper made a good spot for my journaling.

The embellishments are a mix of die cuts from the same Shimelle collection, and Elle's Studio, and the white ink splatters are the Dylusions White Linen mist.

4 November 2016

New Yellow Convertible

At the end of last month, my husband picked up his new car. I'm sure you'll agree that it's definitely yellow, although the official colour, as registered, is orange. Anyway, we're calling it yellow, and this new car was the subject for this week's layout.

When I saw the Borders Paper from the Let's Go collection and the Play With Me paper from the Cute Baby Boy collection, both from Bella Blvd, I realised they'd be perfect for these photos. The addition of a piece of kraft cardstock for the background and the layout had some direction. The photos were matted on some dark brown cardstock and the journalling spot was the stamp from Shimelle's Go Now Go collection from American Crafts.

When it came to the title, I discovered that I only had one set of yellow letter stickers - and I couldn't spell 'yellow' with them... So, out came the Zig Clean Color brush pens to hand script part of the title. The tile letter stickers are from Simple Stories. I kept it pretty minimal with embellishments and the cork arrows and camera are from my stash. The layout did need a little something more, though, so I outlined it with my brown pen and added a few sprinkles of brown mist to complete.

29 October 2016

One Eternal Moment in Time

So, I'm back from a lovely relaxing holiday and itching to get back to creating! I printed some photos from a fab Level 42 concert we went to just before we went away - they're my favourite band and this was an absolutely brilliant evening. I had some ideas in my head of the kind of thing I wanted to achieve, but it really wasn't working for me.

I couldn't find the right shade of blue cardstock, but found one I thought would be ok and, when I masked and sprayed it with Tinsel Heidi Swapp Color Shine, it didn't look as I'd hoped either - the mist was far too subtle. I decided, however, that I could work with it, so stuck down my photos and a couple of strips of patterned paper from the Becky Higgins Project Life Honey Edition - and that was it. No further ideas for where to go next. I hopped over to Shimelle's blog in the hope that she'd posted a challenge while I'd been away, but she had been away too - no new inspiration there, so I left it for a while.

A couple of days later, I went back to my layout, and looked at it, and fiddled a bit, and worked on something else, then looked at it again, and decided that I'd left my creativity on the beach...

Another night's sleep and I had a few more ideas for making the layout work. I'd masked the cardstock background with rings and stars, cut with Spellbinder dies, so I decided to cut a few more, but this time in red and yellow cardstock to help lift the layout. As soon as I started scattering these across the layout, I was much happier with it. The journalling went on a couple of inner circles which nested nicely in one of the bigger rings, and the set list is on a tag which slips behind one of the photos.

30 September 2016

Take Inspiration from a Travel Scrapbook Page

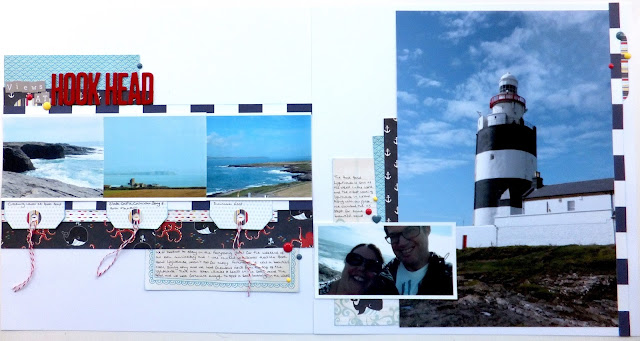
This week's challenge on Shimelle's blog was right up my street! It was to take inspiration from one of her travel pages. I really like this page and, coincidentally, I often create pages which have the photos in a row across the page, so it was ideal for some photos I was itching to scrapbook from a weekend away earlier this month.

This is a double layout, but I really used the inspiration on the left-hand page, with the photos stretching the width of the page, the title above, and the tags below. I actually only cut the tops of the tags and used them to label the photos.

Most of the papers are from the Fancy Pants Designs Down By the Shore collection 6 x 6 paper pad, and the navy and white striped paper was from one of my crafty friends who was having a clear out! A few enamel dots finished off the page.

23 September 2016

Paint the Edge of the Page

Some weeks I know I'm not going to have too much time to scrapbook - and this week was one of those - so I thought I'd be really keen and get a page done on Monday. I had a photo of my nephew meeting Gunnersaurus, the Arsenal FC mascot, and one sheet of paper picked out, so I thought that was a good starting point. Layout done, I decided it really needed a border, so merrily cut down the background paper before realising that a white background was just too wishy-washy, and I didn't have any cardstock the right shade of dark blue - so the layout stayed on my desk.

On Tuesday, Shimelle posted this week's challenge, which is to paint the edge of the page - and there was my answer! Up came the background paper and out came my watercolours to paint the edge of the white cardstock. A couple of minutes later, I have a page I'm much happier with!

The background paper is Stars & stripes from the Amy Tangerine Better Together collection by American Crafts and the other papers are from 6 x 6 paper pads - the Fancy Pants Designs Down By the Shore collection and Simple Stories' A Charmed Life, which was still on my desk from last week! The puffy stickers are from the Attwell collection by Fancy Pants Designs, and a few wood veneer and enamel stars finished the page.

It would never have occurred to me to paint the border on to the white cardstock (if I hadn't already cut down the background paper, I could have painted directly on to it), if it hadn't been for the challenge, but I'm really pleased with the result, so I'd definitely encourage you to give it a go!

16 September 2016

Embellish with Leaf Motifs

One of the reasons for doing challenges is to push yourself to do something different and, when I saw this week's challenge on Shimelle's blog, which is to embellish with leaf motifs, I really thought I'd fail! If you're a regular reader of this blog, you're probably a little puzzled by now as last week's layout had leaves - as have several more layouts this year. However, leaves just don't inspire me, so I don't really buy scrapbooking supplies with leaves - so the extent of my leafy supplies have more or less been used up!

I had a thumb through the photos I had printed and none of them really said 'leaves' to me so, once again, I decided to sleep on it and see what came to mind. In the end, the layout by Leigh Ann Odynsky, which Shimelle included in her post, really stuck with me. As mentioned in a previous post, sewing on my layouts isn't something I'm especially good at so, instead of the sewing, I created messy circles with the spray sticks from the Heidi Swapp Colour Shine mists in gold and seafoam.

The photo is another one from our wedding so, again, I wanted to keep the colours soft. I've layered the photo using some of the A Charmed Life 6x6 paper pad from Simple Stories, and then muted those colours with a scrap of glittered vellum. The flowers, leaves and butterflies are punched from coloured vellum and then rubbed with an embossing tool to give them some dimension. They were sprinkled around the circle, along with pearls, heart-shaped gems, and heart enamel shapes. These and the vellum are all from my stash, as are the row of gems along the bottom of the photo.

8 September 2016

Use Floral Motifs

Do you use flowers in your scrapbooking? I have a bit of a love/hate relationship with them - I love them and see other people's layouts using them, but find it really difficult to make them look good on my own, so I thought I might struggle with this week's challenge on Shimelle's blog, which was to use floral motifs, although I was slightly reassured as one of her examples just has a couple of small flowers.

Having slept on it, I had an idea in my head - I had some photos printed from a wine tasting evening at a local Asian restaurant and was pretty sure that I had the remnants of an old Basic Grey kit which would go with them, so I had a rummage... I eventually came up with a few scraps of the Basic Grey, Konnichiwa collection - I'm not completely convinced this is the collection I had in mind, but the bits I had left really complemented the photos - and the largest scrap of paper I had was a lovely small floral - ideal for the challenge!

The large fabric flowers, felt floral strip, and letter and embellishment stickers are also from the same collection. The background is a cut file I designed myself - it was my first attempt at creating something like this, and there are definitely lessons to be learned!

2 September 2016

Use Lots & Lots of Layers

Following a summer hiatus, the challenges are back on Shimelle's blog and this week's is to use lots & lots of layers. If you've been reading my blog for a while, you'll know that I regularly use layers - but not lots and lots of them - in fact, I struggle a bit with using more than a couple!

My first step was to find a photo I love, and this one, taken of a regular visitor to our garden this last weekend, is definitely a current favourite - I find that, if I really love the photo, the layering becomes just that bit easier. Step two was to rummage through my scrap box and see what I could find to make the photo pop.

I ended up with the remnants of the Serenade collection by Basic Grey, plus a couple more oddments which have been hanging around for a good while! With all of the layers, I didn't really feel as though much embellishment was needed, but a few stickers from the Serenade sticker sheet and some cute wood veneer birds really helped to finish the layout off.

26 August 2016

Eye in the Sky

Yes, I'm still using aeroplane embellishments, but this time it's not the usual travel or plane photos! On the way home from a trip to Scotland earlier this year, we flew over my husband's home town. Rather unusually it was a very clear day, so he took a photo (as well as a photo of the airport as we were taking off).

I love this map print from the original Shimelle collection from American Crafts and it really reminded me of the view you get of streets and houses from the sky, so it had to be used for this layout! On it's own, it's a bit busy, but adding other papers from the same collection really works to soften it.

The Midori D-Clips paperclips are one of my favourite plane embellishments, and the mini clouds, cut using a Memory Box die, are really cute with them. The big arrow is an old chipboard arrow from my stash, painted with cream acrylic paint, and the centre backed with more paper from the Shimelle collection.

19 August 2016

30 Photos!

Following last week's post, I wanted to share the layouts I put together last weekend. We recently went to an airshow and, as you can imagine, took hundreds of photos - some more successful than others! I went through the photos to try to decide what to scrapbook and, several culls later, I had it down to 30 photos. I didn't, however, want to create 30 pages - or even half that - there are a couple of small stories, but not pages-worth so, the solution was to use a pocket page.

The pocket page sits between two co-ordinating full-sized pages, both with large photos and smaller square photos. The journalling spots - outlined plain white cardstock - are common to each page and this helps to tie them all together, as well as keeping to a narrow colour palette.

The background papers are the double-sided Frisbee paper from the Making Waves collection by Fancy Pants and the rest of the papers/embellishments are from my stash - there really aren't enough aeroplane embellishments available!

12 August 2016

Photo Overload

Do you ever have too many photos to choose from? Maybe it was just one day and you don't have huge amounts of things to say about any of them, but you love the photos? I regularly have this problem and have found the answer to be pocket pages.

This page will sit between two regular scrapbook pages with my most favourite pictures from the day's sightseeing in Corfu Town during our recent holiday. We have brochures too, so those will go in a smaller pocket alongside them.

I've been using the Summer Vibes collection from Simple Stories for all of the pages from this holiday and these are no exception. I've used the 3 x 4in cut-aparts to back the smaller photos and scraps to make the caption banners so we know what the photos are of!

5 August 2016

Stitch on Your Page

One thing I almost never do is stitch on my scrapbook pages. I bought a small sewing machine for use with paper many moons ago, but I seem to be mostly incapable of stitching in a straight line with it! Hand sewing is always a possibility, and something I have done occasionally, but it's really time consuming, so it doesn't happen. However, the challenge this week on Shimelle's blog is to stitch on your page, so it was a good prompt to give it a go!

When thinking about incorporating the sewing, I wanted to create something a bit pretty and girly, and I knew I definitely wanted to use a black and white photo. Next month it will be our 10th wedding anniversary, but I haven't really scrapbooked many of our wedding photos. Our photographer gave us a lovely mix of colour and black and white photos, so I had a look through those to see if anything grabbed me. This was one of my favourite photos of the day - me arriving at the church with my dad. I didn't want to get too far from our wedding colours - navy blue and bright, sunflower yellow, with a bit of gold thrown in, so I had a rummage through my scraps to see what I could find - I think the muted yellow and the pale greeny-blues work pretty well.

I started by building the photo stack and then ran this through the sewing maching, a couple of times in each place, before sticking it to the background, just in case it all went completely wrong! The papers are a mix of Simple Stories, Basic Grey and My Mind's Eye, the gold script vellum has been in my stash for years. I decided to add a dash of pink, just to lighten the colours slightly. The embellishments are a mix of Simple Stories, Shimelle and Cocoa Vanilla Studio and, of course, the gold splatters are Heidi Swapp Gold Colour Shine.

29 July 2016

Take Inspiration from an Autumnal Page

Ok, so I really struggled with the challenge this week on Shimelle's blog which was to take inspiration from one of her autumnal scrapbook pages. If you hop over to her post, you can see a process video of how it all came together.

I had to abandon this page half way through as it really wasn't working - I'd aligned everything to the right, as in the inspiration page, but a good night's sleep later, I realised that that meant your eye was drawn to the shed, rather than the people. A quick flip of the page, and suddenly everything worked much better! As well as the layout, I also took inspiration from the leaf motifs and found some paper with some simple leaf shapes which were nice and easy to cut out!

The background paper is from the Simple Stories Sn@p! basics collection and the rest of the papers are from my scrap box. The chipboard pieces are from the My Mind's Eye Market Street, Nob Hill collection. The short journalling is on a piece of vellum which gives a really subtle look.

22 July 2016

Take Inspiration from Planners

Do you use a planner, or a diary? No? Me neither, in fact I often forget to even put things on the electronic calendar I share with my husband, so I thought I was really going to struggle with this week's challenge on Shimelle's blog, which was to take inspiration from planners. The examples shown both use elements of routine but, really, when your daily routine feels pretty mundane and boring, it's not exactly something inspiring to scrapbook, so it was back to the pile of photos I had printed.

I discovered that I'd printed 7 smaller pictures of some of the meals we'd eaten on a recent holiday to Corfu, so that seemed like a good start! My original plan when I printed these was to put them in a 3 x 3 grid, with embellishment and journalling in the other two spaces but, when laid out, it didn't really work so, going back to the planner idea, two rows, like two pages in a diary, worked much better!

The papers and embellishments are almost all from the Simple Stories Summer Vibes collection. I did also feel the need to use a couple of planner stamps from the Heidi Swapp Hello Beautiful icons stamp set, just because!

14 July 2016

Cut Your Scrapbook Embellishments by Hand

Anyone who knows me knows that I really don't have the patience to fussy-cut anything when it comes to scrapbooking, but this week's challenge on Shimelle's blog is to do exactly that!

This is a double-layout of one of the places we visited during our holiday in Italy last year. The strip of green patterned paper either side of the photos is the In Flight paper from the Hello World collection from My Mind's Eye, and all those flowers (and the journalling spot) are from the Dear Lizzy Neapolitan line from American Crafts.

Needless to say, not all of the leaves attached to the flowers made the cut, and this really took an age, but there are a few flowers left to be cut out for other pages of this trip.

7 July 2016

Go Overboard with Stars

This week I've been having fun playing with my new Silhouette Cameo. While much of using pre-designed cut files is pretty straightforward, there's still a bit of a learning curve to be taken to design cut files yourself, but I'm working on it. I'd already purchased a stars cut file from the Silhouette store and had a photo of a partial lunar eclipse from last year ready to scrap so the challenge this week on Shimelle's blog - to go overboard with stars - was ideal!

I love the look of layouts which use a cut file and back the shapes with different papers, but I hadn't realised just how time consuming it is to do that! Needless to say, it took me a while, but all the different papers are from the Galileo paper from the Shimelle Starshine Collection from American Crafts. The different sized blocks of colours and patterns were just the thing to back the stars, and although I used pieces of the Gemini paper and Keppler paper from the same collection as photo mats, all the other layers under the photo are leftover scraps from that original Galileo sheet.

I popped the cut file up on some foam and backed it with another sheet of black cardstock - I love the shadows this creates. The additional stars are wood veneers covered with platinum stickles glitter glue for that bit of sparkle.

1 July 2016

Take Inspiration from a Colourful Border

This week's challenge on Shimelle's blog is to take inspiration from a colourful border. My page for this challenge is something slightly unusual for me - a do-over. I originally created this page a few months ago - I think it was probably the first page I created using photos from our holiday in Italy. At the time I wasn't too enamoured with what I'd created but, like many of us, I considered the page scrapped and in to the album it went. Whizz forward a few months and most of the other pages for this holiday are complete, and this page was sticking out like a sore thumb for two reasons:

  • Most of the other pages for this holiday are on plain white cardstock - this page was on a busy background
  • The papers were from a completely different collection to the other pages from the holiday - I obviously didn't have a plan in mind when this page was created!
So, here's the re-done page.

I kept the thin mat and the embellishment clusters from the original, but the other matting layers and background paper were discarded. Instead, I used the In Flight paper from the Hello World collection from My Mind's Eye as a second mat and a selection of washi tapes and a border strip to enhance the embellishment clusters. And, just for good measure, I added strips of tape to the top and bottom of the page. I've no idea of the brands of tapes I used, but I normally buy them from Hey Little Magpie who always have a great selection!

I'm much happier with this page now and it sits much better with the other pages in my album.

24 June 2016

Scrapbook with Split Complementary Colours

We're back with the challenges! This week's challenge on Shimelle's blog is to scrapbook with split complementary colours. I must admit, I read that and wondered what on earth that meant! Fortunately, she does break it down - look at a colour wheel and pick a colour, then go across the wheel and select the two colours either side.

I sometimes struggle with colour challenges but, when I saw these photos of my nephew, I noticed he'd done half the work for me by wearing a red top with lime green accents - all my layout needed was the addition of teal, although, admittedly, I went a bit more turquoise!

The papers on this layout are, again, from my scrap box and are rather old. The red is from the Studio Calico Abroad collection (the white dots really reminded me of the table tennis balls!), the arrows are from the Imaginisce Perfect Vacation collection, and the cameras are from a scrap of a Simple Stories paper.

I'd never used a colour wheel in my scrapbooking before and I'm not convinced I'll be doing it again, but it is an easy way to pick a colour scheme.

17 June 2016

Bubbles Fun

As there was no challenge on Shimelle's blog this week, I thought I'd share a layout I created this week from my stack of recent photos. We sometimes look after a friend's dog and she loves playing with bubbles, so I thought I'd document her most recent stay with us.

The Bubblicious paper from the Dear Lizzy Happy Place collection from American Crafts was absolutely perfect for the background paper - the rest of the papers are scraps from Basic Grey, Cosmo Cricket, Seven Paper, Project Life, Shimelle and Dear Lizzy - proof that you really can mix collections!

I also dug in to my stash for buttons and brads. I don't like leaving button centres empty, but thought that threading them would detract too much from the circular embellishment. The answer was some old Gossamer Blue enamel dots. The white dots from the Get Happy collection weren't a solid colour but almost had a clear covering (which the photos don't really pick up), making them perfect for bubble embellishments.

3 June 2016

Take Inspiration from a Scrapbook Page Sketch

This week's challenge on Shimelle's blog was to create a scrapbook page from this page sketch.

One of the positives of doing the weekly challenges is that I've found some photos which have been in the 'to be scrapped' pile for some time - these photos are two of those! Some years ago the company my husband was working for was sold. All staff moved to the new company's offices, and this documents the end of an era when the signs came down from the building.

I kept pretty faithfully to the sketch, using papers from Shimelle's True Stories collection by American Crafts, puffy letter stickers from Freckled Fawn and random bits and pieces from my stash. My husband is still to journal on the tags, and he's also going to find one of his old business cards to pop in the envelope too.

27 May 2016

Stamp a Frame

Apologies for being MIA for a couple of weeks - life kind of got in the way. However, I'm back with this week's challenge on Shimelle's blog to stamp a frame.

As my photo was of a chess tournament, I wanted to stamp a chess-board looking frame - but didn't really have a suitable stamp - and then I found an old checked border stamp (I've had it for ages and the packaging's long gone, so no idea where it came from, unfortunately) which, when stamped several times, kind of gave the idea of a chess board (well, it did to me!). I used this as the background layer on my cardstock before layering on the papers and photo.

The papers and chipboard embellishments are from the It's a Charmed Life collection from Simple Stories. There are a few enamel stars from the Shimelle collection from American Crafts and the alphas, washi tape, and small black enamel dots are from my stash.